How would you like to make this bakery-style Rosemary and Olive Bread at home? With just a few minutes of prep? This recipe makes it easy, with no-kneading or special equipment. If you think you can't easily make perfect bread at home, think again.
In this step-by-step recipe, I show you how easy it is to make your own Rosemary and Olive Bread at home! Start the dough in the morning and let it rise during the day. Before dinner, cook the dough to make some delicious warm bread to serve with your meal. I promise, you can do this.
Ingredients you'll need
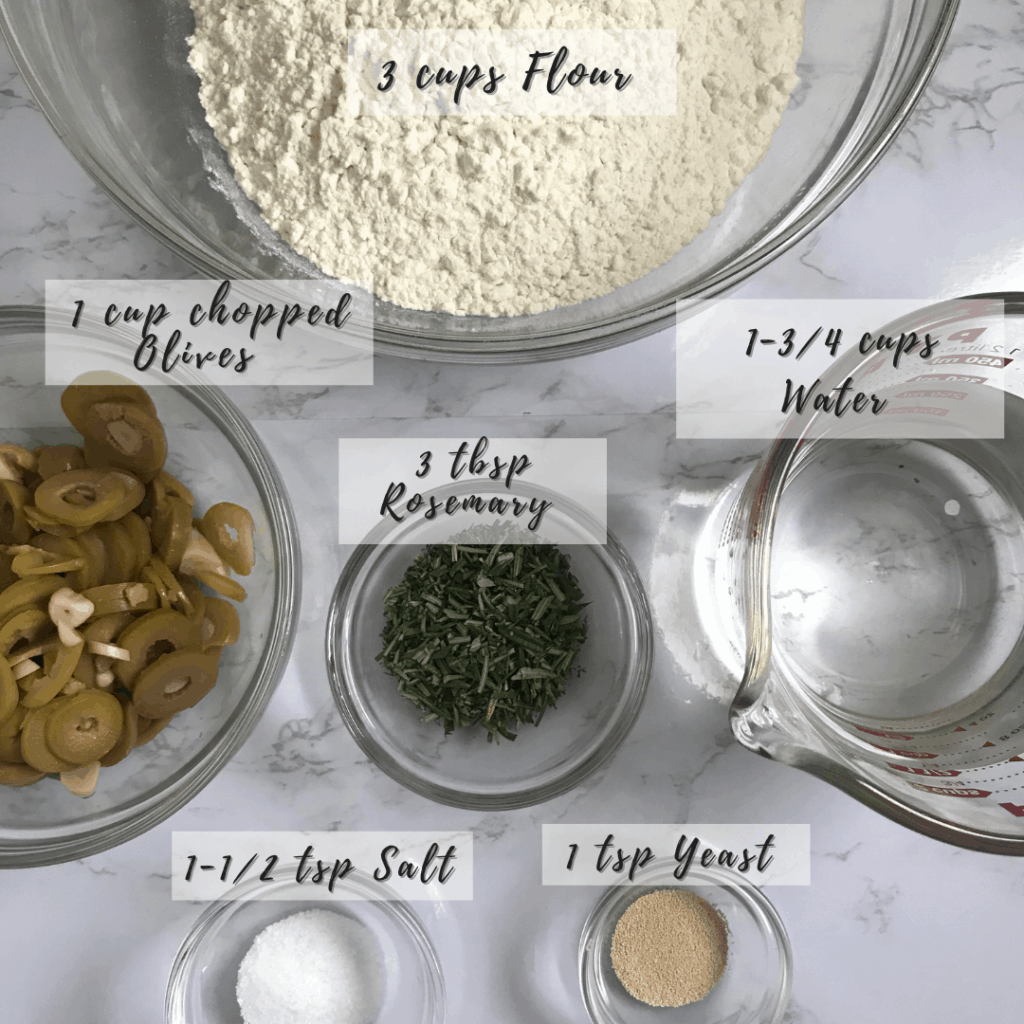
All-Purpose Flour
Salt
Chopped Olives (I used Garlic-Stuffed)
Chopped Fresh Rosemary
Active Dry Yeast
Warm Water
Olive Oil for Brushing
Equipment
Cast Iron Skillet (8 inch works best)
Spatula
Large Bowl
Plastic Wrap
Kitchen Towel
Tips and Tricks
Make sure your yeast is fresh.
After opening, yeast is only good for 6 months if stored properly in the refrigerator. So if you aren't sure the age of your yeast, buy some fresh yeast.
Fresh yeast is important here because it's what makes the dough rise and gives the bread a fluffy and soft texture. If your yeast is old, the dough will not properly rise and your bread may be chewy and dense.
Don't over mix the dough.
You don't need to mix the dough very much with this recipe. Over mixing will cause the glutens in the dough to develop and make for a gummy bread. Only mix until the ingredients are combined.
Cool the bread on a cooling rack.
Cooling the bread on a cooling rack with prevent soggy bread. Cooling the bread in the skillet will create steam and may cause the bread to get soggy.
Optional Cooking Tip
Get an extra crunchy exterior: Place a metal baking tray on the lower rack of the oven while your oven is preheating. When the oven is ready, place the skillet of dough on the middle rack and fill the baking tray with a few cups of hot water. This will create a "steam oven" which is what bakeries will use to create a crunchy crust.
Be careful when opening the oven if you choose to do this method. Open the oven carefully and step back for a second to give the steam a chance to escape. The steam can burn if not careful.
The Process
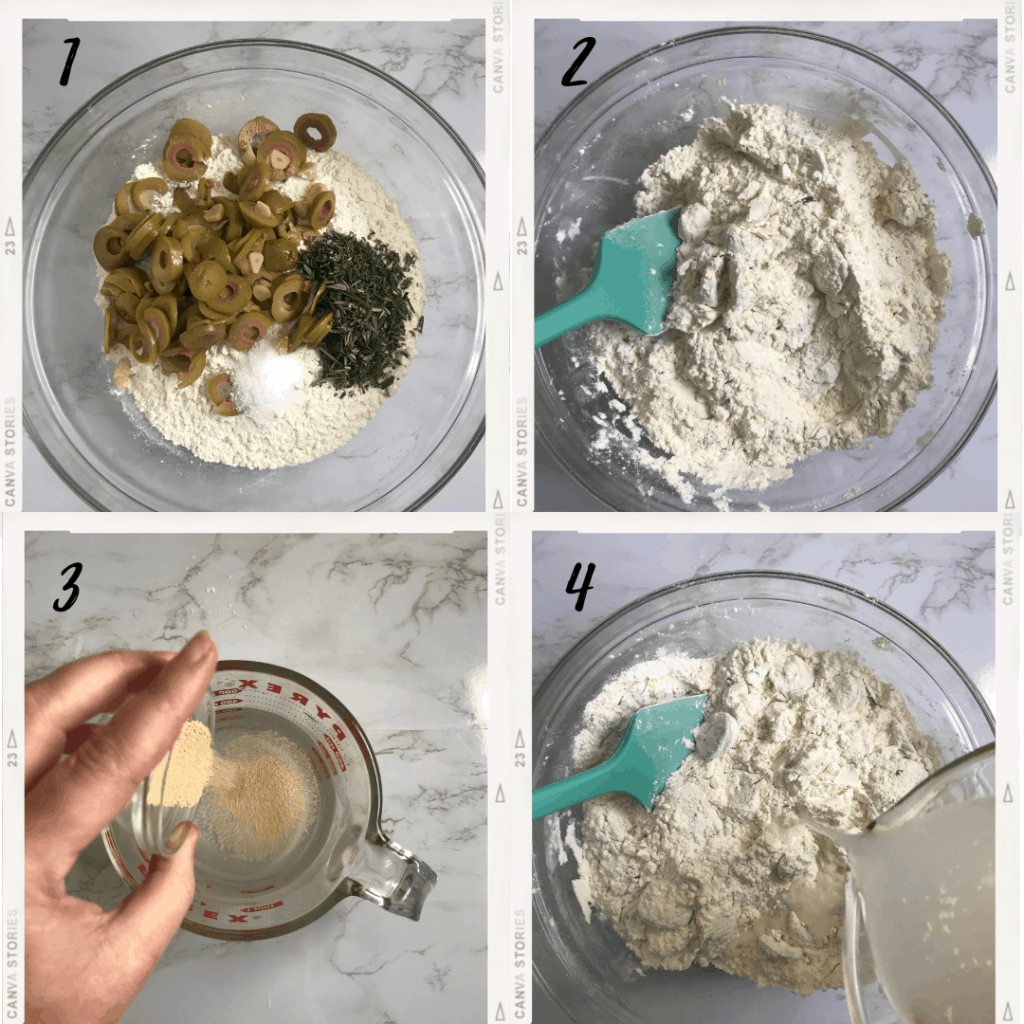
1.Add all ingredients except yeast and warm water to a large bowl.
2.Gently mix together until well combined.
3.Add yeast to warm water and stir.
4.Add water and yeast mixture to dry ingredients.
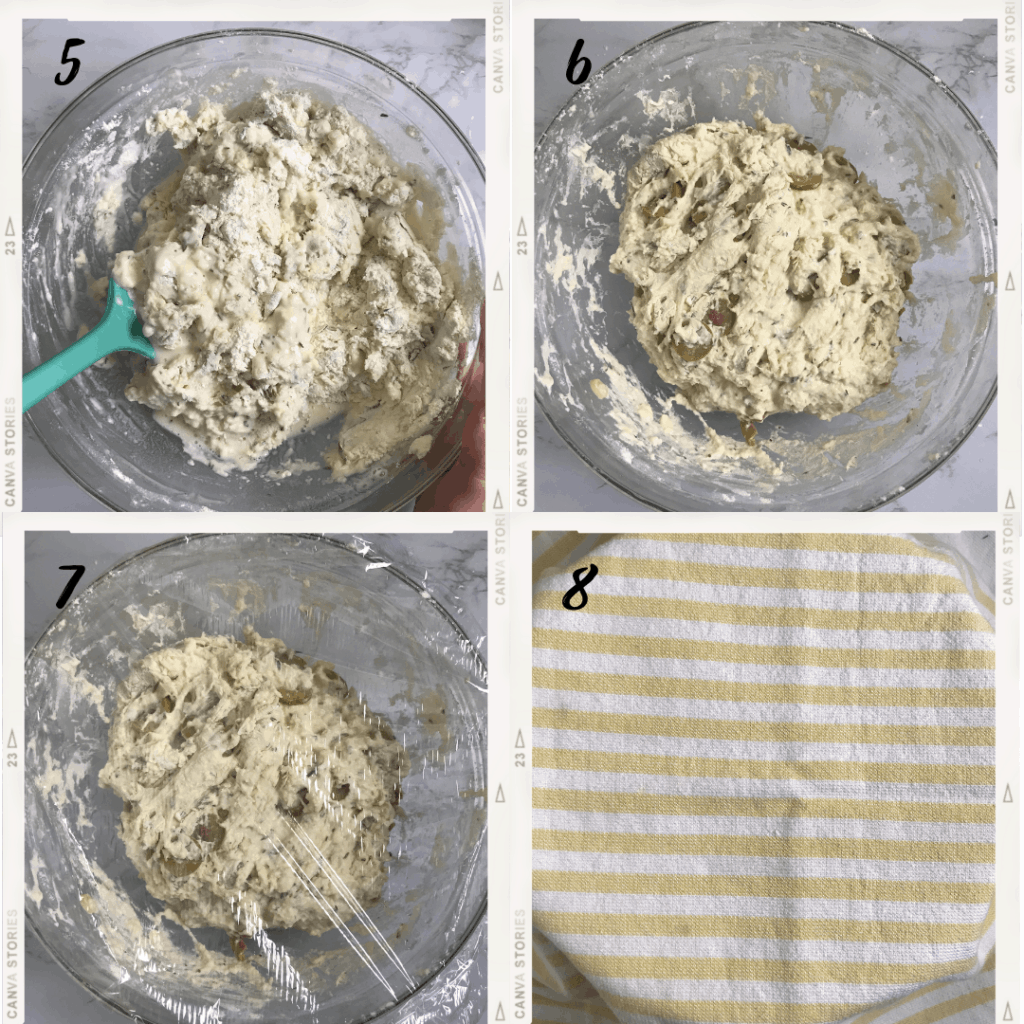
5. Stir to combine. If dough is still dry add warm water 1 tablespoon (about 4 tablespoon total) at a time until the dough looks like picture 6 above.
6. Finished dough
7. Loosely wrap in plastic wrap
8. Cover with a kitchen towel and keep in a warm place like the stove-top for 4-6 hours. (Keep in the fridge if resting overnight)
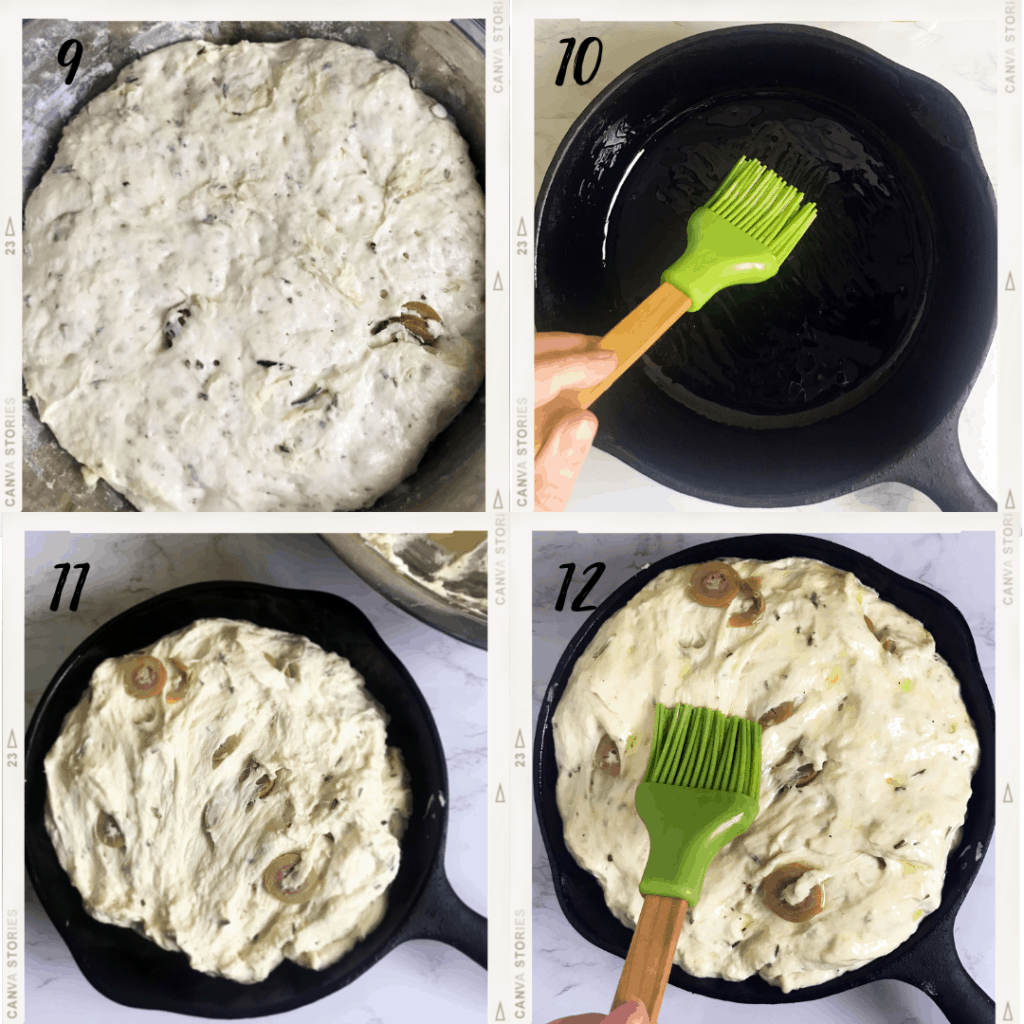
9. Dough should double in size after 4 hours.
10.Brush the entire inside of the cast iron skillet with olive oil. Be sure to get the sides as well.
11. Using a spatula, transfer the dough to the skillet. Cover with the bowl and let rest 30 minutes.
12. After resting, brush dough with olive oil and bake on center rack of the oven for 30 minutes. Rotate at 20 minutes to ensure even browning. *See notes if you want to use the "steam oven method" to cook the bread.
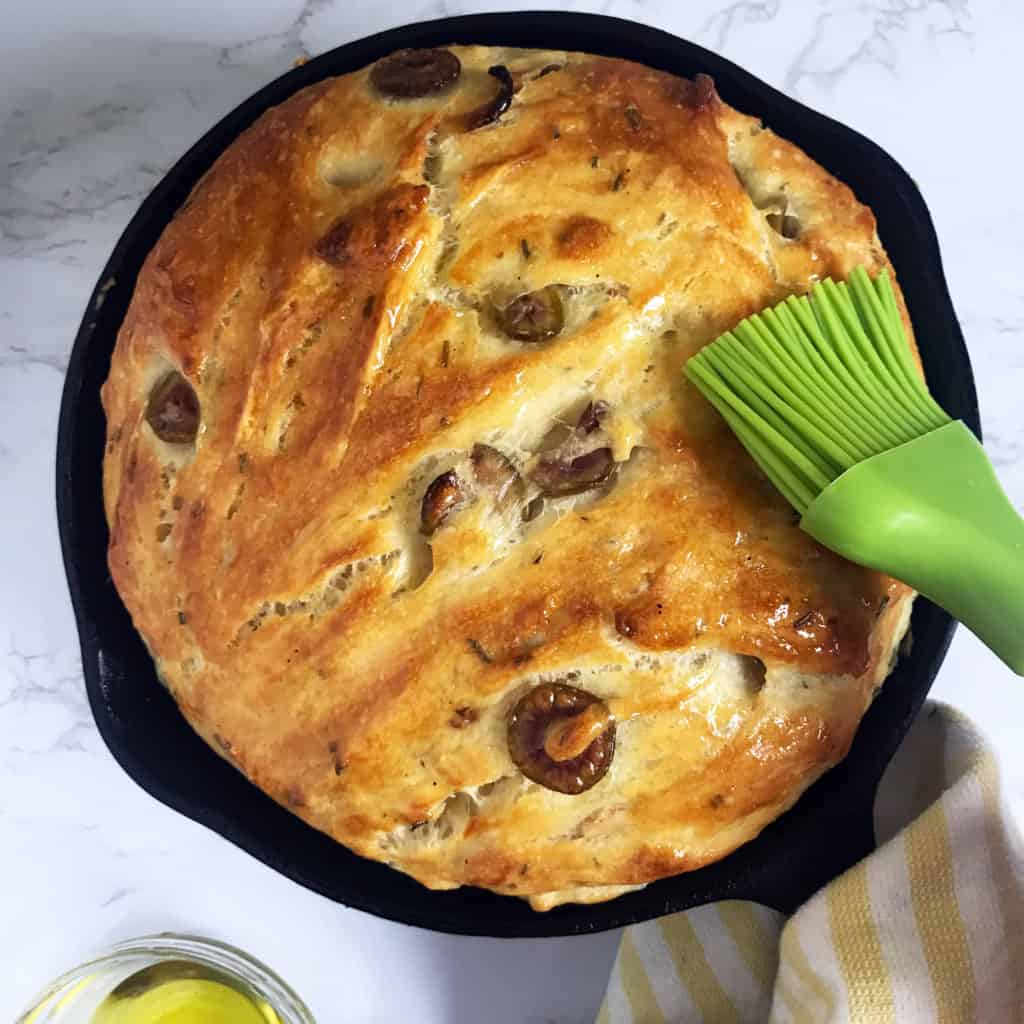
13. When done baking Brush the top with olive oil. Protect your hands with a kitchen towel. Remove from skillet and place bread on a cooling rack. Let rest for 10-20 minutes before cutting.
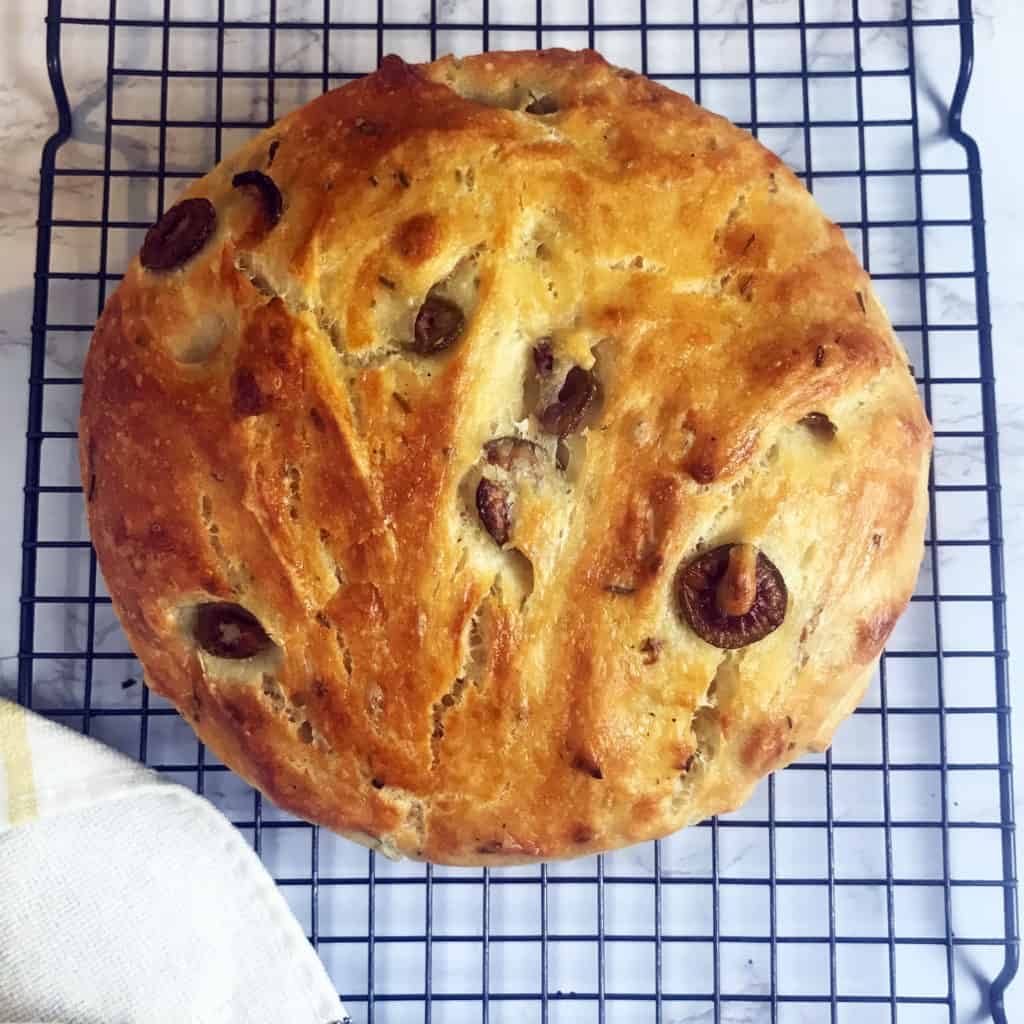
You just made bread!
What to serve with this bread
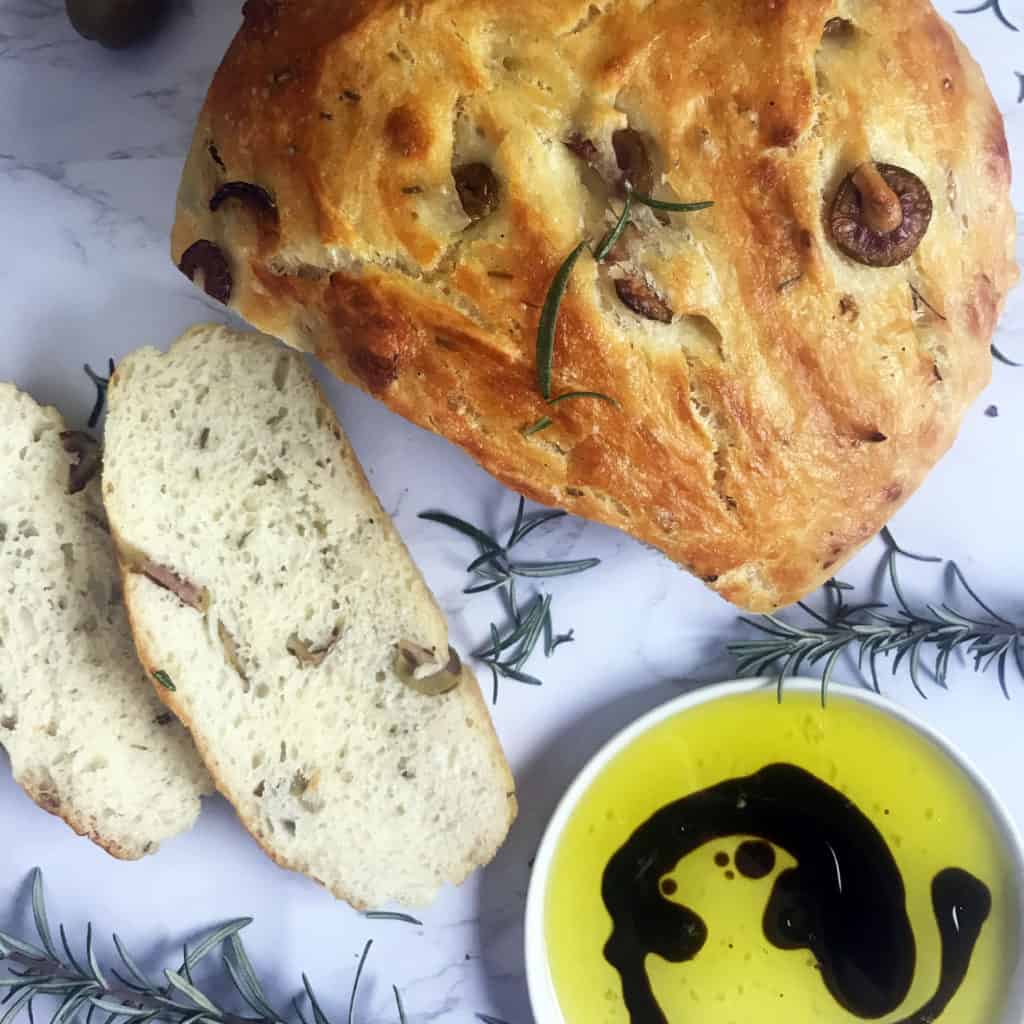
*This Rosemary and Olive Bread is best served with a side of olive oil and balsamic vinegar..just divine!
*Serve with unsalted butter sprinkled with a flaky and crunchy finishing salt.
*Serve warm along side salads such as this Vegan Caesar Salad.
*Grill bread slices and top with fresh mozzarella and tomatoes for a simple bruschetta.
*Slice and serve along side cured meats, cheeses, mustards and veggies for a simple sandwich platter.
How to store and freeze
This bread is best the day it's baked but is good when toasted for up to 2 more days.
You can freeze in a sealed bag for up to 3 months. Defrost and toast or warm bread slices for best flavor.
📖 Recipe

Easy Olive and Rosemary Bread (No-Knead + Skillet Baked)
Click the stars to rate.
Equipment
- Cast Iron Skillet, 8 or 10 inch
Ingredients
- 3 Cups All-purpose flour
- 1½ teaspoon Salt
- 1 Cup Sliced Green Olives I used garlic stuffed from Trader Joe's
- 3 tablespoon Chopped Fresh Rosemary
- 1 teaspoon Active Dry Yeast
- 1½ Cups + 4 Tbsp Warm Water
- 3 tablespoon Olive Oil for brushing
Instructions
To Make the Dough:
- Add all ingredients except yeast and warm water to a large bowl and gently mix together until well combined.
- Add yeast to warm water, stir to combine. Add water and yeast mixture to dry ingredients.
- Stir to combine. If dough is still dry add warm water 1 tablespoon (up to 4 tablespoon total) at a time until a sticky dough forms.
- Loosely wrap in plastic wrap. Cover with a kitchen towel and keep in a warm place like the stove-top for 4-6 hours. (Keep in the fridge if resting overnight)
Prep for Baking:
- Brush the entire inside of the cast iron skillet with olive oil. Be sure to get all the sides as well.
- Using a spatula, transfer the dough to the skillet. Cover with the bowl and let rest 30 minutes.
- After resting, brush dough with olive oil.
Bake the Bread:
- Preheat oven to 450F
- Bake on center rack of the oven for 30 minutes. Rotate at 20 minutes to ensure even browning. *See notes if you want to use the “steam oven method” to cook the bread.
- When done baking Brush the top with olive oil. Remove from skillet and place bread on a cooling rack. Let rest for 10-20 minutes before cutting.
- Serve with love and enjoy!

Patti Treptow
This recipe is awesome! Never successfully bake bread until I tried
your recipe and it is fantastic!!! Thanks so much for sharing. I'm looking
forward to making it for family gatherings. Take care.
Suzie J.
That is so wonderful to hear! Thank you for sharing your experience, Patti!
Beth
This bread is so delicious! I used Kalamata Olives. I put mine in the refrigerator to rise overnight and maybe I didn’t understand the instructions but it did not rise so I put it out In the 75° outside weather and it rose. The dough looked really sticky more so than other breads I’ve made. I was really concerned that I had done something wrong but it turned out amazing
Greg Sevilla
This bread has so much flavor! Best homemade bread
Suzie J.
Thanks for sharing! I'm glad you liked it!